Event Calendar + RSVPs
On This Page
- Getting Started
- Adding Events
- Adding Event Link to your Menu
- Changing Default View between "list" and "Calendar"
- Collecting RSVP's
** Update on Facebook imports ** Unfortunately, with the changes that Facebook made back in April, they no longer third party software to import or access Event details even if they are public. The creator of our calendar software is in the process of apply for special access to Facebook's API, but as of June 13th the application was still under review. Read more here
Getting Started
The event calendar is only available for Garden and Estate members. If you'd like to upgrade, follow the instructions here
- Enable the Event Calendar and add the "Events" link to your main menu
- Login to your site dashboard
- Click on "Site Setup" from the left hand menu
- Click "Enabled Features" and find the Events calendar toggle
- After enabling the Calendar, click "Update" in the upper right hand corner.
- The event calendar is now enabled, and the Event link is visible on your main menu.
Adding a New Event
- Login to your Dashboard
- Click "Events" from your admin menu and "Add New"
- Fill in the important info
- Event Title and Details go in the big box
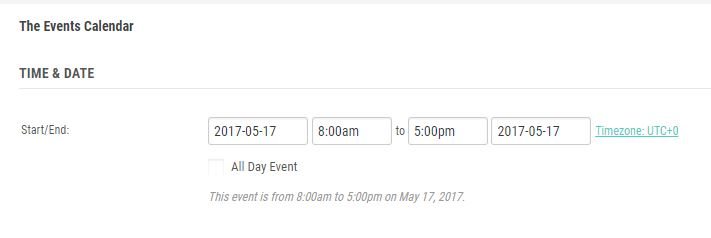
- Time and Date
- Location - enter in a location if people are supposed to attend in person
- Organizers - you can add contact information for whoever is hosting
- Event Website - This could be a facebook event, or a link to a paid ticketing service like Event Bright
- Cost - Leave blank and it won't show
- On the Right hand side of the screen are some options

- Make sure to choose a featured image, which will show up in your list of events, and also if you share the event link on facebook

- Once you're finished click "Publish" in the upper right of your screen
Add or remove events link from your menu
To add or remove the menu link for the Events Calendar look under Site Setup -> Enable Features. Turn on or off the event calendar and hit update. This will automatically add or remove the link in your menu.
If you would like to move the location of the Event link in your menu, change it's title or make any other menu customization, checkout this menu editing tutorial for instructions
Display Events List or Calendar View
When someone clicks your "Events" link, you can either have the shown a list of upcoming events, or a calendar. Here is how to change the default.
- From your admin dashboard click on "Events" and then "Settings"

- Scroll down until you see "Default View" and choose between List, Month, or Day

- Scroll to the bottom of the page and save your settings
Collecting RSVPs
You can collect RSVP through the event on your website - If you choose this option, your event will be listed as FREE. If you want to collect money for your events, I recommend using event bright or another paid ticketing service. You can list the events on your site, and then include the event bright link as the URL for the event.
- On the event editing screen look at the very top of the page on the right hand side where it says, "Screen Options". Click the drop down, and make sure that "event tickets" is checked. Otherwise you won't see the RSVP or Ticket Options

- On the event editing screen, scroll to the bottom of the page and look for RSVP
- Fill in the details - "Type" is treated as the Title or Name of the RSVP ticket

- When you view your event you'll now have a Confirm RSVP button. If someone RSVPs they'll get an email with event details


